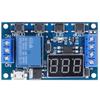
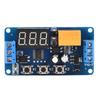
Features:
Wide power supply voltage from 6V to 30V, support USB 5.0V power supply, very convenient to use.
Interface is clear, simple and powerful, easy to understand, almost meet all your needs.
The module supports reverse input , and there is a STOP button for emergency stop function.
Added sleep mode, it will automatically turn off display if no in 5 minutes after enabled, and you can press any button to wake it up.
You can set different OP, CL, LOP parameters, these parameters were independent of each other and saved respectively.
All set parameters will be automatically saved if there is a power failure.
With optical coupling isolation, improved anti-interference ability, industrial level circuit board.
Specifications:
Voltage: 6V~30V(support USB 5.0V)
Quiescent Current: 20mA
Operating Current: 50mA
Operating Temperature: -40℃~85℃
Size: Approx. 6.2*3.8*1.7cm / 2.44*1.49*0.67\"
Timing Range: 0.1seconds to minutes(continuously adjustable)
Instruction:
Mode:
P1: After triggering , switch is
connected for \"OP
\"
time, then disconnected; within the
\"
OP
\"
time:
P1.1:
if trigger again,
it is
invalid.
P1.2: if trigger again, restart timing.
P1.3: if trig
ger again, switch is disconnected, stop timing.
P-2:
After
triggering
, switch is disconnected for
\"
CL
\"
time, then switch is connected for
\"
OP
\"
time, and disconnect after timing.
P3.1: After triggering , switch is connected
for
\"
OP
\"
time, then switch is disconnected for
\"
CL
\"
time, and enter loop. If
trigger during loop, switch is disconnected and stop timing. The loop times
(LOP) can be set.
P3.2: After power on, no need trigger
, switch will be connected for
\"
OP
\"
time, then disconnected for
\"
CL
\"
time, and enter loop. The loop times (LOP) can be set
P-4: holding function. If there is trigger
, timing will be reset, switch remains connected; when the
disappears, it will disconnect after
\"
OP
\"
time. During timing, if there is a
, timing will be reset.
OP: Connect time. CL: Disconnect time. LOP:
Loop times(1~,
\"
---
\"
indicates infinite times)
All parameters are independent from
each other, but all modes use the same parameters. For example, if set OP time
as 5 seconds in P1.1, then change to P1.2, then the OP time in P1.2 will also be
5 seconds.
Press SET button at the main interface (display
000), it will show OP(CL, LOP) and corresponding time.
If there is only OP mode (e.. P1.1,
P1.2, P1.3), press SET button to
display OP and corresponding time only.
If there are OP, CL, LOP modes (e..P3.1,
P3.2), press SET button to display OP, CL, LOP and corresponding time.
After setting mode, press SET button at the
main interface to check the parameter of present mode.
How to Choose Timing Range:
After setting parameter in the interface selection
mode, press the STOP button to select the time range:
XXX.
If the last decimal
point lights up, the time range is 1sec to 999sec.
XX.X
If the second last
decimal point lights up, the time range is 0.1sec to 99.9sec.
X.X.X.
If all decimal points
light up, the time range is is 1 min to min.
For example, if you set OP as 3.2 seconds,
the make the second last point light up, and it displays 03.2
How to Set Parameter:
1. Make sure mode.
2. According to the mode, at main
interface(after power on, it will flash present mode then enter main interface),
press and hold SET button for 2 seconds to enter mode selection interface, then
press UP, DOWN button to choose mode (P1.1~P-4)
3. After selecting mode, press short SET button
to set the corresponding parameter, then the parameter you want to set will
flash. Press UP, DOWN button to set value, then press STOP button to select
time range. Press SET button to set next parameter.
4. After setting mode parameter, press and
hold the SET button for 2 seconds then the present mode will flash, and go back
to the main interface.
Main interface: when relay does not work,
it shows \"000\" (no decimal point); when relay is working, it shows decimal
point
Mode Selection Interface: Press and hold SET
button to enter. After setting, press and hold SET button to back to main
interface.
Relay Enable Mode:
1. NO: Connection is allowed during OP time.
2. OFF: Connection is not allowed, always turned
off.
Press STOP button at main interface to
change between ON and OFF, the present state will flash then back to main
interface. (This is emergency stop function, used to disconnect relay.)
Sleep Mode:
C-P sleep mode: if no within 5
minutes; display will close automatically while procedure runs normally.
O-d normal mode: displays always shows.
Press and hold STOP button for 2 seconds to
change between C-P and O-d, present state will flash and then back to the main
interface.
Package Includes:
1 x Timer Switch Module
Note:
Please note that the new type and old type of this product will be sent randomly, and make sure you will not mind before ordering.